Author: loadnode

  • Temperature Stable Powder: The Proven Path to Consistency

    Temperature Stable Powder: The Proven Path to Consistency

    You work up a load on a mild 70°F range day, it shoots beautifully, and then a January match at 20°F throws your elevation off at distance. The culprit is almost always powder temperature sensitivity: and it is why temperature stable powder has become a quiet obsession among precision shooters. This guide explains what temperature stable powder actually means, how much velocity really moves per degree, and how to test your own load instead of taking anyone’s word for it.

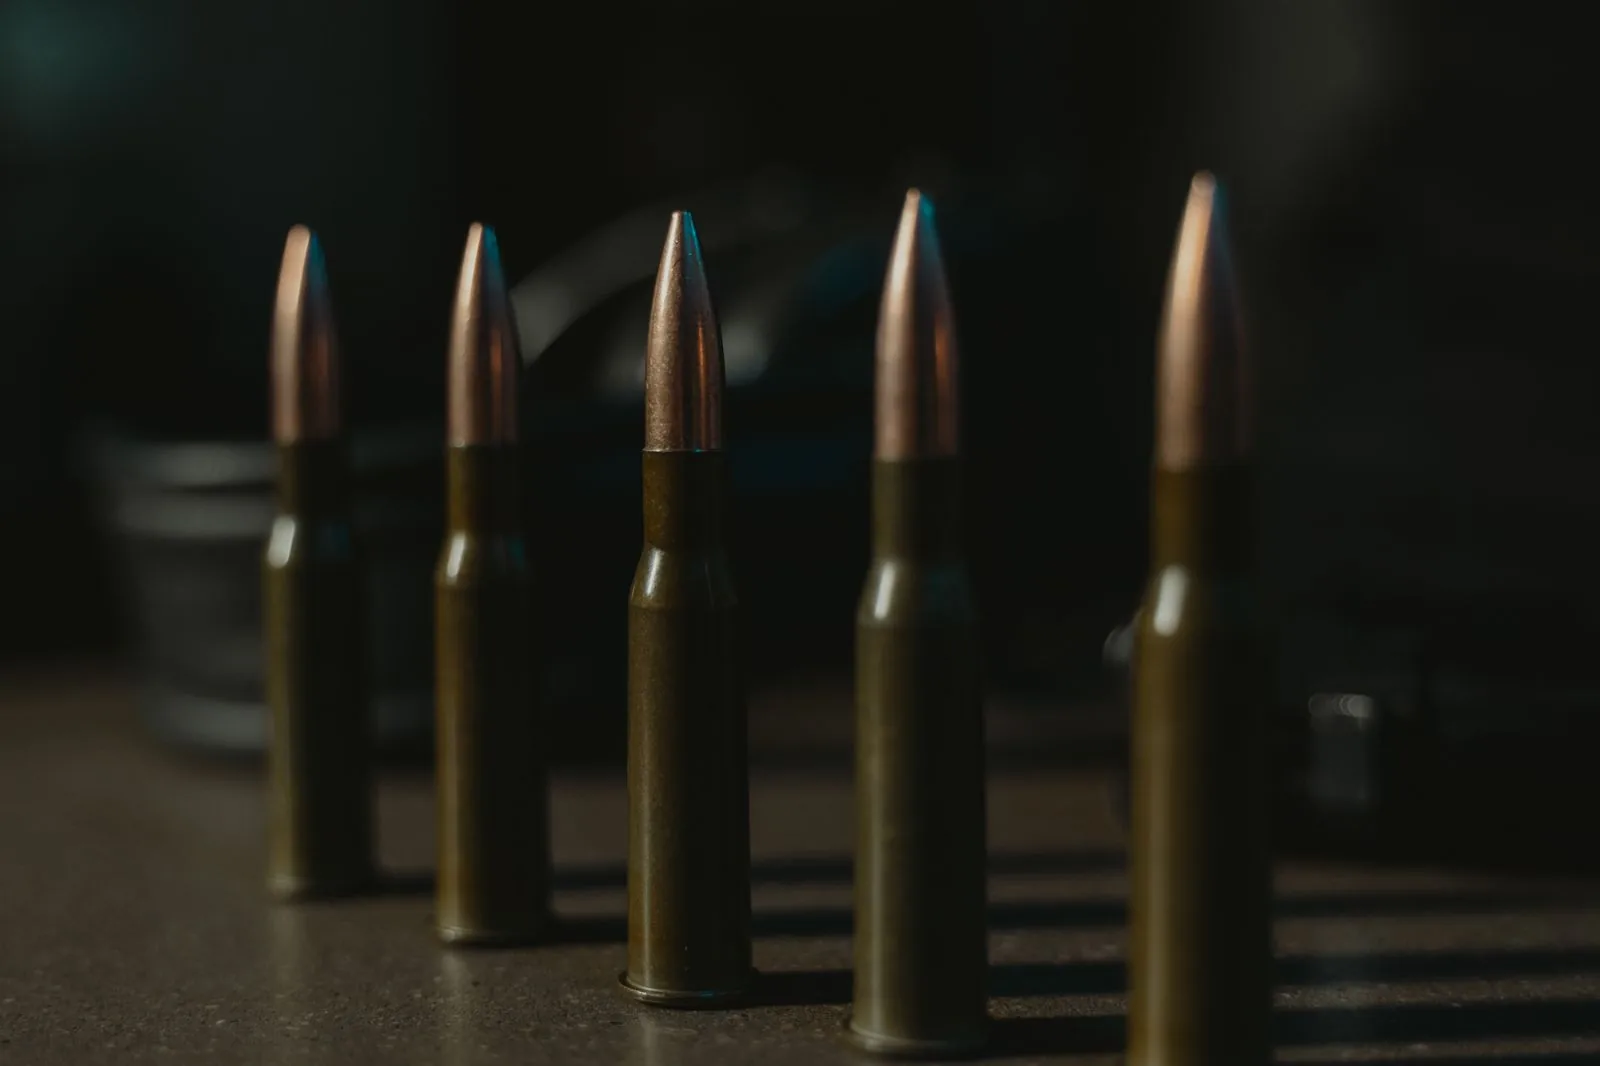
    Temperature stable powder keeps velocity consistent: loaded rifle cartridges standing upright

    Why a temperature stable powder matters

    Smokeless powder burns faster when it is warm and slower when it is cold. A warmer charge builds pressure quicker, so muzzle velocity climbs; a cold charge does the opposite. Because your elevation at distance is driven by velocity, a temperature swing quietly shifts your point of impact even though nothing on the rifle changed. A temperature stable powder is simply one engineered to minimize that shift across a wide temperature range.

    How much does velocity really change?

    The numbers vary by powder, but the pattern is clear:

    • Powders not formulated for temperature stability are commonly cited as shifting roughly 1.5–2.0 fps per °F, with some older extruded rifle powders sitting at the higher end of that range.
    • Powder lines marketed as temperature stable typically publish figures of a few tenths of an fps per °F across a very wide temperature span. Those are the manufacturers’ own claims, not measurements we have made, so read the current published data for whatever powder you already use and treat any range quoted here as background rather than a specification.

    Do the math on why this matters: a 60°F swing at 1.5 fps/°F is about 90 fps of velocity change. At 1,000 yards that can be a meaningful chunk of elevation: enough to walk you off a target. The same swing with a genuine temperature stable powder might move you only 15–25 fps, which you may never see on paper. For context on how velocity spread ties to accuracy, see what a good SD really is.

    Test your own load: don’t assume

    Marketing claims are a starting point, not gospel; real-world sensitivity depends on your cartridge, load intensity and barrel. The only way to know is to measure it:

    1. Chronograph the same ammunition on a genuinely cold day and again on a genuinely hot one, recording the ambient temperature and how long the rounds sat at it before firing. Do not deliberately heat loaded ammunition to create the hot data point: let the seasons do it, and follow the powder and ammunition manufacturers’ published storage and temperature warnings, because a load that is safe on a cold morning can run materially higher pressure when hot.
    2. Record the average muzzle velocity and standard deviation at each temperature.
    3. Divide the velocity difference by the temperature difference to get your load’s real fps-per-degree.

    That gives you an estimate, not a constant. Two strings on two days is a very small sample and the answer carries real uncertainty, so treat it as provisional, keep adding strings as the seasons change, and only re-true your DOPE once the same trend shows up repeatedly.

    Temperature sensitivity also shows up as a cold-bore surprise. If your ammunition sat overnight in a cold truck and you fire that first shot on a frosty morning, a temperature-sensitive load can print noticeably low, then walk up as the barrel and remaining rounds warm. A more stable powder shrinks that first-shot shift, which matters enormously to hunters and match shooters who only get one cold-bore shot that counts. It is one more reason the temperature question is really an accuracy question, not just a chemistry curiosity.

    Log it so the pattern is obvious

    A single cold-day string is noise; the same load logged across a year of temperatures is a trend you can act on. LoadNode ties every velocity string, average, SD and ES, to the exact load, barrel and conditions behind it, so you can look at your own velocity-against-temperature record instead of relying on marketing claims. It does not rank powders, score them against each other or tell you which one won; that reading stays yours to make. Chasing a temperature stable powder only makes sense once you can actually see what temperature is doing to your rifle.

    Handloading is an adult activity done at your own risk. LoadNode is a logbook and analysis tool: it never provides load data. Always develop loads from current published manufacturer data and work up safely.

  • Spin Drift and Coriolis: The Truth About Extreme Range

    Spin Drift and Coriolis: The Truth About Extreme Range

    Two forces get talked about breathlessly on long-range forums and misunderstood in equal measure: spin drift and Coriolis. Some shooters obsess over them at 400 yards where they are meaningless; others ignore them at 1,200 where they matter. This is the honest, numbers-first truth about spin drift and Coriolis: how far each really moves your bullet, in which direction, and when you should actually care.

    Spin drift and Coriolis in play as a shooter aims a scoped rifle downrange

    Spin drift: your own bullet’s gyroscope

    Spin drift (gyroscopic drift) comes from the bullet itself. A bullet spun by a right-hand twist barrel steadily walks to the right as it flies, because the spinning projectile noses slightly in the direction of its precession. For a typical small-arms trajectory, spin drift is roughly 8–9 inches to the right at 1,000 yards: and essentially nothing at 300. It is constant and predictable in one direction, which is exactly why a ballistic solver can dial it out if you tell it your twist direction.

    Coriolis: the spinning Earth under the bullet

    The Coriolis effect comes from the Earth rotating beneath the bullet during its several-second flight. It has two parts:

    • Horizontal Coriolis: in the Northern Hemisphere the bullet deflects to the right regardless of which way you face, about 2.5–3 inches at 1,000 yards near 45° latitude (left, in the Southern Hemisphere).
    • Vertical Coriolis (the Eötvös effect): shooting east makes you hit slightly high; shooting west, slightly low; firing due north or south has no vertical effect.

    Combined, for a right-twist rifle in the Northern Hemisphere, spin drift and Coriolis push a 1,000-yard shot roughly 11–12 inches right in zero wind: about 9″ from spin drift and 2.5″ from Coriolis. See Applied Ballistics’ technical paper for the full derivation.

    When spin drift and Coriolis actually matter

    Put it in perspective: at 1,000 yards a mild 5 mph crosswind can move your bullet more than both of these effects combined. That is the key insight about spin drift and Coriolis: below roughly 700–800 yards they are lost inside your wind uncertainty and your own dispersion, so chasing them is a distraction. Beyond about 1,000 yards, and especially in extreme long range shooting, they grow into inches and then feet, and ignoring them guarantees a miss.

    The effect people forget: aerodynamic jump

    While everyone argues about spin drift and Coriolis, a third effect quietly moves the bullet vertically: aerodynamic jump. A crosswind does not only push the bullet sideways: because the bullet is a spinning gyroscope, a wind from the left tends to nudge the group up or down as it leaves the muzzle, and a wind from the right the opposite way. The amount is small, but at long range it explains why your elevation seems to shift slightly with a strong side wind. Like spin drift and Coriolis, it is deterministic and handled by a good solver, which is the whole point: these effects are not mysteries, they are inputs.

    How to handle them

    You do not compute spin drift and Coriolis by hand. Any modern solver includes them: just feed it honest inputs: your barrel’s twist direction, your latitude, and your firing azimuth, on top of a chronographed muzzle velocity and a measured BC. Then confirm the result on steel and bake it into your DOPE card.

    LoadNode keeps the velocity and group data behind each load tied to the barrel that shot it, so the numbers you feed your solver are your own. Understand spin drift and Coriolis for what they are: small, predictable, and only worth your attention once your wind and fundamentals are already solved.

    Handloading is an adult activity done at your own risk. LoadNode is a logbook and analysis tool: it never provides load data. Always develop loads from current published manufacturer data and work up safely.

  • How to Build a DOPE Card: The Complete Long-Range Guide

    How to Build a DOPE Card: The Complete Long-Range Guide

    A ballistic app can predict your bullet’s path, but the target has the final say. The bridge between the two is your DOPE card: the confirmed record of what your rifle actually does at distance. Knowing how to build a DOPE card the right way, and validating it on steel, is the difference between dialing with confidence and hoping. Here is the complete process.

    How to build a DOPE card: rifle scope elevation and windage turrets dialed on a bipod rifle

    What DOPE means

    DOPE stands for Data On Previous Engagements: your rifle’s personal cheat sheet of elevation and windage corrections for each distance. A good DOPE card lets you glance, dial and break a clean first shot at 700 yards without doing math on the clock. It lives on a card, an armband, a turret sticker or your phone, but it always represents confirmed data, not just a prediction.

    How to build a DOPE card, step by step

    1. Get your true muzzle velocity. Never trust the box. Chronograph your actual load: a Garmin Xero, MagnetoSpeed or similar: and use the real average. This one input drives your entire trajectory.
    2. Gather rifle and ammo data. Your bullet’s ballistic coefficient (and model, G1 or G7), your zero distance, sight height over bore, and barrel twist.
    3. Feed a ballistic solver. Enter everything into a calculator such as Hornady 4DOF, Applied Ballistics or Strelok Pro, along with current atmospherics: altitude, temperature, pressure and humidity.
    4. Generate the drop chart. Output your elevation (and wind) holds in MIL or MOA to match your scope, in whatever distance increments you like: typically every 100 yards.
    5. Print it and go shoot. That predicted chart is your starting point, not your finished DOPE card.

    Truing: where a prediction becomes real DOPE

    This is the step most people skip: and it is what separates a printout from real, trusted DOPE. Take your predicted chart to the range and shoot at known distances: 300, 400, 500 yards and beyond. Record the actual come-up needed for a center hit at each distance. If your real dials do not match the solver, adjust the calculator’s inputs, usually muzzle velocity first, then BC, until the predictions line up with your fired data. This is called truing. Once trued, your solver becomes trustworthy even for distances you have not yet shot, and your DOPE card is honest.

    How to carry your data

    Trued numbers only help if you can read them fast under stress. Common formats include a laminated card taped to the stock or wrist, a printed strip wrapped around the scope’s turret, an elevation ring engraved for your exact load, or a phone app that shows the solution live. Many shooters keep two: a printed backup that never runs out of battery, and a digital solver for on-the-fly atmospheric changes. Whatever the medium, list distance in one column and your elevation hold or dial in the next, with a wind reference for a standard crosswind. The best format is the one you can glance at and trust without a second thought.

    Keep your DOPE card alive

    Conditions change your data. A big shift in altitude, a 40°F temperature swing, or a new lot of ammo can all move your numbers, so note the conditions your DOPE was trued in and re-check when they change. Log every confirmed drop: that record is the most valuable thing you own as a long-range shooter, and it pairs directly with your wind reads.

    LoadNode keeps your chronographed velocities, standard deviations and group results tied to the exact load and barrel behind them, so when you build a DOPE card you are truing against your own verified data rather than a number off a box. Learn how to build a DOPE card once, true it honestly, and your rifle stops surprising you.

    Handloading is an adult activity done at your own risk. LoadNode is a logbook and analysis tool: it never provides load data. Always develop loads from current published manufacturer data and work up safely.

  • FFP vs SFP Scopes: The Smart Choice for Long Range

    FFP vs SFP Scopes: The Smart Choice for Long Range

    When shoppers compare rifle scopes, the spec that confuses them most is focal plane: and the FFP vs SFP decision genuinely changes how you shoot. It is not marketing fluff: first focal plane and second focal plane scopes behave differently the instant you touch the magnification ring. This guide explains the FFP vs SFP difference in plain English, who each one suits, and how to choose without overspending.

    FFP vs SFP focal planes shown on a variable rifle scope with magnification numbers

    The core FFP vs SFP difference

    In a first focal plane (FFP) scope, the reticle sits ahead of the magnifying lenses, so it grows and shrinks with the image. That means the reticle’s hash marks, your MIL or MOA subtensions, represent the same value at every magnification. In a second focal plane (SFP) scope, the reticle stays a constant physical size while the image zooms, so those subtensions are only correct at one specific magnification (usually the maximum). That single behavior is the whole story.

    A quick way to tell them apart

    Not sure which one you have? Look through the scope at a fixed object and spin the magnification ring. If the reticle appears to grow and shrink along with the target, it is first focal plane. If the crosshair stays exactly the same size while the image zooms, it is second focal plane. On an SFP scope, check the specification sheet for the magnification at which the reticle is “calibrated”: that is the one power where your holdovers are honest. Miss that detail and a holdover that should be 1 mil might really be 2, which at distance is a clean miss. Understanding this is half of resolving the FFP vs SFP question for your own setup.

    Why PRS and long-range shooters favor FFP

    If you use your reticle to hold for elevation and wind: the norm in Precision Rifle Series and practical long range: FFP is the clear pick in the FFP vs SFP contest. You can dial your magnification to whatever gives the best sight picture for a given target and distance, and your holdovers stay true. There is no mental conversion, no “this mark only works on 25x.” For a competitor calling their own corrections at varying ranges, that reliability is worth a lot.

    Where SFP still wins

    • Hunting and general use: if you mostly dial your elevation and hold center, an SFP reticle stays a clean, consistent thickness at all powers and never gets too fine to see against a dark animal at dawn.
    • Aiming precision at high power: an SFP reticle can be drawn thinner without disappearing at low magnification, covering less of a small target.
    • Budget: for near-identical models, the SFP version is usually cheaper, because FFP reticles are more complex to build.

    The classic FFP vs SFP trade-off on the FFP side is that the reticle can look thick and busy at maximum power, or thin and hard to see at minimum power: though modern illuminated first focal plane designs have largely tamed this with a fine center dot that lights up when you need it. One myth worth killing: focal plane has nothing to do with magnification range, glass quality or eye relief. A first and second focal plane version of the same scope share the same optics and tube; the only real difference is whether the reticle scales with zoom. Everything else on the spec sheet is unaffected.

    How to choose

    Make the FFP vs SFP call on how you will actually shoot:

    • Hold-based, variable distances, competitionFFP.
    • Dial-and-hold-center, hunting, tight budget, fixed-range targetSFP is perfectly capable.

    Whichever you choose, pair it with turrets and a reticle in the same unit (see our MOA vs MIL guide) and a validated DOPE card. LoadNode logs your holds and dials in your chosen unit so your data matches your glass. Get the FFP vs SFP decision right up front and your reticle becomes a tool you trust instead of a math problem you dread.

    Handloading is an adult activity done at your own risk. LoadNode is a logbook and analysis tool: it never provides load data. Always develop loads from current published manufacturer data and work up safely.

  • MOA vs MIL: The Definitive Guide to Choosing a Reticle

    MOA vs MIL: The Definitive Guide to Choosing a Reticle

    Few debates start more arguments at the loading bench than MOA vs MIL: and almost all of the heat is misplaced. Neither unit is more accurate, more “tactical,” or more correct. They are just two rulers for measuring angle. What actually matters in the MOA vs MIL question is that your turrets, your reticle and your brain all speak the same language. This guide gives you the exact numbers, the real trade-offs, and a clear way to choose.

    MOA vs MIL compared through a rifle scope reticle with holdover marks

    What MOA and MIL each are

    MOA (minute of angle) is one-sixtieth of a degree. At 100 yards it subtends 1.047 inches: close to an inch, which is where the “inch at 100” shorthand comes from. Most MOA scopes adjust in 1/4 MOA clicks (about 0.26″ at 100 yards).

    A MIL (milliradian, or mrad) is one-thousandth of a radian. At 100 yards it subtends 3.6 inches, or a tidy 10 cm at 100 meters. Most MIL scopes adjust in 0.1 MIL clicks (about 0.36″ at 100 yards). If you want the underlying geometry, here is the definition of a milliradian.

    MOA vs MIL: the conversions

    The one number that settles most MOA vs MIL confusion: 1 MIL = 3.438 MOA. So a 0.1 MIL click (0.36″ at 100 yd) is a hair coarser than a 1/4 MOA click (0.26″). In practice both are far finer than any rifle’s dispersion, so the “which is more precise” argument is a wash for real shooting.

    Unit At 100 yd Common click Click at 100 yd
    1 MOA 1.047 in 1/4 MOA ~0.26 in
    1 MIL 3.6 in 0.1 MIL ~0.36 in

    The only rule that matters: match your turrets to your reticle

    The single biggest MOA vs MIL mistake is a scope with a MIL reticle and MOA turrets (or vice versa). When they mismatch, you cannot see a miss in the reticle and dial the correction directly: you have to convert mid-string, which is how hits get dropped. Whichever you choose, make sure the reticle subtensions and the turret clicks are the same unit.

    Spotting and correcting is faster in one unit

    Here is where the MOA vs MIL choice pays off in the real world. Say your spotter sees your miss land two marks left of the target in the reticle. If your reticle and turret are the same unit, you simply dial or hold that same two marks right: no conversion, no delay. This is why the MOA vs MIL decision is really a decision about friction: any time your eye measures an error in the glass and your hand corrects it on the turret, matching units removes a step. In a timed stage or on a moving animal, that saved second is the difference between a hit and a story about the one that got away.

    So which should you pick?

    • Choose MIL if you shoot with others (PRS/NRL and the military overwhelmingly speak mils, so spotter corrections are instant), like base-10 math, or think in metric.
    • Choose MOA if you think in inches, want the slightly finer click, or already own MOA glass and know it cold.

    There is no wrong answer in MOA vs MIL: only the wrong mixture. Pick one system, run it on both the reticle and the turret, and commit. For measuring your groups in either unit from a photo, see our guide on how to measure group size in MOA.

    LoadNode reports your groups and holds in whichever unit you prefer, MOA or MIL, so your logbook always matches the scope on your rifle. Settle the MOA vs MIL question once, then spend your energy on wind and fundamentals, where the real points are.

    Handloading is an adult activity done at your own risk. LoadNode is a logbook and analysis tool: it never provides load data. Always develop loads from current published manufacturer data and work up safely.

  • Extreme Long Range Shooting: The Ultimate ELR Primer

    Extreme Long Range Shooting: The Ultimate ELR Primer

    Past a certain distance, marksmanship becomes as much a physics and data problem as a trigger-pull problem. That is the world of extreme long range shooting, ELR, where shooters send bullets a mile and beyond, flight times stretch past several seconds, and the smallest error in data becomes yards of miss. This primer explains what extreme long range shooting is, the flagship King of 2 Miles match, the cartridges that make it possible, and why nothing matters more than verified data out there.

    Extreme long range shooting from the prone position toward a distant hillside

    What counts as extreme long range shooting?

    There is no single line, but the sport generally calls anything beyond about 1,500 yards extreme long range shooting, running out to two miles and more. For reference, two miles is 3,520 yards. At those distances a bullet may be in the air for five to seven seconds, drop hundreds of feet, and pass through the transonic zone where stability gets tricky. Everything that is a rounding error at 600 yards, spin drift, Coriolis, a 10 fps velocity change, becomes a first-round hit or a clean miss.

    Three problems define the discipline. Time of flight means the target, the wind and even the light can change before the bullet arrives. The transonic transition, as the bullet slows from supersonic to subsonic, can induce instability and open up dispersion unless the projectile is very stable. And wind is layered: over 2,000 yards the bullet may cross several different wind zones at once, each pulling it a different way. Solving those is what makes ELR a team sport rather than a one-person trigger pull.

    The King of 2 Miles

    The premier event in extreme long range shooting is the King of 2 Miles (Ko2M), held at the NRA Whittington Center in Raton, New Mexico, and running since 2015. Qualifying targets sit from roughly 1,550 to 2,700 yards, with finals pushing toward the full two miles. Tellingly, it is a team sport: each competitor runs with a shooter, a dedicated wind coach and a ballistician-spotter, because no one person can track all the variables in real time. That team structure tells you everything about how much data drives ELR.

    The cartridges of extreme long range shooting

    To carry energy and buck the wind past a mile, ELR leans on big, high-BC magnums. The dominant chamberings are the .375 CheyTac and .416-class cartridges (such as the .416 Barrett and various wildcats), firing long, heavy, ultra-high-BC bullets. Lighter ELR and the transition from tactical shooting often use the .338 Lapua Magnum. These cartridges retain supersonic velocity and resist wind far downrange: the whole point of ELR is keeping the bullet predictable where lesser rounds have gone subsonic and unstable.

    Why data beats guessing past a mile

    At ELR distances you cannot “Kentucky windage” your way to a hit. A serious extreme long range shooting attempt depends on a trued ballistic solver fed with real inputs: a chronographed muzzle velocity, a measured (not advertised) ballistic coefficient, live atmospherics, latitude and firing azimuth for spin drift and Coriolis, and confirmed drops from actual fired data. The bullet does exactly what physics says: your job is to feed the model honest numbers.

    That is why a disciplined logbook matters even for the mile-plus crowd. LoadNode keeps your true velocities, standard deviations and group data tied to the exact load and barrel that produced them, so the numbers you feed your solver are your own verified data. Whether you ever shoot a formal ELR match or just stretch your rifle to its limit, the lesson of extreme long range shooting is the same: measure everything, and trust data over hope. Build your holds with a good DOPE card and validate them on steel.

    Handloading is an adult activity done at your own risk. LoadNode is a logbook and analysis tool: it never provides load data. Always develop loads from current published manufacturer data and work up safely.

  • What Is PRS? The Essential Precision Rifle Series Guide

    What Is PRS? The Essential Precision Rifle Series Guide

    If you have watched shooters run a bolt gun off a tank trap against a timer and wondered what you were seeing, that is the Precision Rifle Series. The Precision Rifle Series (PRS) is the largest organized practical long-range rifle competition in the world, and it has quietly reshaped what production rifles, optics and cartridges look like. This guide explains how the Precision Rifle Series works, the divisions, the stage formats, and why 6mm and 6.5mm cartridges dominate the firing line.

    Precision Rifle Series shooter aiming a scoped bolt-action rifle at an outdoor match

    What the Precision Rifle Series actually is

    Founded in 2011, the Precision Rifle Series is a season-long points race across dozens of independent matches, culminating in a championship for the top-ranked shooters. Unlike traditional prone bullseye shooting, PRS is practical: you engage steel targets, usually from 300 to 1,000 yards, from awkward positions, barricades, rooftops, tank traps, tripods and rocks, against a par time, typically 90–120 seconds per stage. You are scored on hits, so speed and a good wind call matter as much as a tight group. See the Precision Rifle Series overview for the full history.

    Match format and stages

    A one-day club match usually runs 8–10 stages; a two-day national-level Pro Series match runs 18–20. Each stage is a short problem: engage five or ten targets at varying distances from one or more positions before the clock runs out. Because you rarely shoot twice from the same spot, positional stability, a stable bag or tripod, and knowing your holds cold are everything.

    Divisions in the Precision Rifle Series

    • Open: the premier bolt-gun class; rifles may not exceed .30 caliber or a muzzle velocity of 3,200 fps. This is where the custom rifles and chassis live.
    • Tactical: restricted to .308 Winchester and .223 Remington/5.56 NATO.
    • Production: caps the rifle at $3,000 MSRP and the optic at $2,500, to keep it attainable.
    • Gas Gun: semi-automatic rifles, limited to .30 caliber / 3,200 fps.

    The sister NRL (National Rifle League) runs a similar format, and many shooters compete in both.

    Why 6mm and 6.5mm cartridges dominate

    Walk any PRS match and you will see a sea of 6mm and 6.5mm rifles. The reason is simple: low recoil lets the shooter spot their own impact through the scope and correct for the next target without breaking position. The 6.5 Creedmoor made this mainstream from about 2015 onward; today lighter-recoiling 6mm cartridges such as the 6mm Creedmoor, 6 Dasher and 6 GT are the tip of the spear at the top of the standings. High ballistic coefficient plus mild recoil beats raw power in a game scored on hits.

    Gear that makes a competitive rig

    The tools follow the game. A modern chassis or bedded stock with a wide, flat fore-end rides barricades; a heavy contour barrel soaks up strings of fire; a bipod plus a big rear support bag stabilizes odd positions; and a good tripod lets you build a position anywhere. Above it sits a high-magnification first focal plane scope with a mil or MOA reticle that matches the turrets, so holds and dials speak the same language. None of it replaces the fundamentals, a stable position, a broken shot, and an honest wind call still win stages, but it removes excuses. Read our take on FFP vs SFP scopes to understand why competitors run first focal plane glass.

    How to get into the Precision Rifle Series

    You do not need a $6,000 rig to start. A capable factory precision rifle, an FFP scope with a matching reticle and turrets, a bipod and a rear bag will get you through your first club match: and clubs are famously welcoming to new shooters. What you do need is trustworthy data: a true muzzle velocity, a validated DOPE card, and a growing feel for reading wind.

    That is where a good logbook earns its keep. LoadNode links every load you develop to the groups and velocities it produced, so when you build the load for a PRS season you are working from your own verified numbers, not guesses. The Precision Rifle Series rewards the prepared: and preparation is mostly good data.

    Handloading is an adult activity done at your own risk. LoadNode is a logbook and analysis tool: it never provides load data. Always develop loads from current published manufacturer data and work up safely.

  • How to Read Wind for Long Range Shooting: 7 Proven Tips

    How to Read Wind for Long Range Shooting: 7 Proven Tips

    Of every variable in precision rifle work, wind is the one that never sits still: and learning how to read wind for long range shooting is what separates a first-round hit from a spotter calling “miss, left.” Elevation you can solve on a laptop; wind you have to solve in the moment. This guide covers the clock method, full- and half-value winds, how to estimate speed from mirage and flags, and the simple formula that turns a wind you can feel into a hold you can dial.

    How to read wind for long range shooting: a shooter prone behind a scoped bolt rifle reading the wind in an open field

    Why you have to read wind for long range shooting

    Wind deflection is not linear with distance: it grows faster than range does, because the bullet keeps slowing down and spends ever more time in the crosswind. A 10 mph full-value crosswind might push a .308 roughly 10 inches at 500 yards, but the same wind can move it well over 30 inches by 600 yards. That accelerating penalty is exactly why you must read wind for long range shooting rather than hold center and hope.

    The clock method: direction and value

    Picture the target at 12 o’clock and yourself at 6. A wind from 3 or 9 o’clock blows straight across your line of fire: a full-value wind with maximum deflection. A wind from 12 or 6 o’clock (a head- or tailwind) is a no-value wind that barely moves the bullet sideways. Everything in between is partial:

    • Wind at 1:30, 4:30, 7:30 or 10:30 (45°) ≈ 75% value (technically 70.7%).
    • Wind at 1, 2, 4, 5, 7, 8, 10, 11 o’clock (30°) ≈ 50% value.

    So a 10 mph wind quartering in at 45° behaves like a 7–7.5 mph full-value wind. Getting the value right matters as much as getting the speed right when you read wind for long range shooting.

    Estimating wind speed: flags, mirage and feel

    You will rarely get a number handed to you, so build several reads and average them:

    • Mirage: the heat shimmer seen through your scope is the single best tool because it reads the air between you and the target. Boiling straight up means no crosswind; a slow wave is roughly 1–3 mph; a faster horizontal run is about 4–5 mph; and a flat, hard-slanting run signals a strong wind, often past 10 mph.
    • Flags, grass and dust: a flag standing at 45° is roughly 5 mph; straight out is 12–15 mph. Watch multiple indicators at different distances, not just the one at your muzzle.
    • Feel: wind you can just feel on your face is about 3–5 mph; wind that moves small branches is closer to 10.

    Wind nearest the muzzle has the longest lever arm on the bullet, so weight your reads toward the first two-thirds of the range, not the target.

    The wind formula that turns a read into a hold

    The classic field shortcut for minutes of deflection is:

    MOA of wind = (range in hundreds of yards × full-value wind in mph) ÷ C

    where C is a constant for your cartridge and velocity: commonly around 15 for fast, high-BC match loads at mid ranges and lower (nearer 10) for slower rounds. A 6 mph full-value wind at 600 yards with a constant of 12 gives (6 × 6) ÷ 12 = 3 MOA. The right long-term answer is a verified ballistic solver, but the formula keeps you in the game when the wind switches on the clock. For MRAD shooters, solve in mils the same way with your reticle’s subtensions. Learn more in our reloading and shooting resources.

    Log every wind call: that is how you actually improve

    The fastest way to get better at reading wind is to record what you called, what you held, and where the shot actually landed. Over a season those notes reveal your personal bias, most shooters chronically under-call wind, and let you build a mental library of conditions. LoadNode ties every group you measure and every velocity string to the exact conditions and load behind it, so your wind calls become data you can review instead of memories you forget. Pair that with a solid DOPE card and your holds stop being guesses.

    Nobody masters wind in a day. But with the clock method for value, mirage and flags for speed, and the formula to convert it, you now have a repeatable process to read wind for long range shooting instead of flinching at the flags.

    Handloading is an adult activity done at your own risk. LoadNode is a logbook and analysis tool: it never provides load data. Always develop loads from current published manufacturer data and work up safely.

  • How to Use a Chronograph

    How to Use a Chronograph

    A chronograph turns “that load felt fast” into real numbers: and those numbers are the backbone of precision reloading. But a chronograph only helps if you set it up right and read it correctly. Here is how to use a chronograph properly, from placement to interpreting your SD and ES, plus the mistakes that quietly wreck good data.

    In this guide

    What a chronograph measures

    A chronograph measures your bullet’s muzzle velocity: how fast each round leaves the barrel. From a string of shots it also computes the average, the standard deviation (SD), and the extreme spread (ES). Those consistency numbers, not just the raw speed, are what you actually act on when developing a load.

    Optical vs radar chronographs

    There are two common kinds. Optical (skyscreen) chronographs detect the bullet’s shadow as it passes over light sensors; they are affordable but fussy about lighting and require you to shoot over the unit at the right height. Radar chronographs (such as the Garmin Xero or LabRadar) sit beside the muzzle and track the bullet with Doppler radar: far less sensitive to light and generally easier to use. If you use a Xero, see our guide on getting velocity data off your Garmin Xero.

    Setting it up correctly

    • Optical: place it the maker’s recommended distance from the muzzle (often around 10–15 feet), align so the bullet passes cleanly above the sensors, never so low you risk shooting the unit, and give it even, consistent light (overcast or the supplied diffusers).
    • Radar: position it beside and just behind the muzzle per the instructions, pointed downrange, and keep it square to the line of fire.
    • Either way, keep the unit in the same position for every string so your data is comparable.

    How many shots to record

    A two- or three-shot string tells you almost nothing about consistency. Record at least five shots, and ten or more if you want an SD you can trust: the same sample-size logic covered in what is a good SD for reloading. The more rounds behind the numbers, the more meaningful they are.

    Reading the numbers

    Look past the headline average. The SD tells you how consistent your velocities are, and it is the number that predicts vertical at distance; the ES is the simple high-minus-low and is jumpier from string to string. Single-digit SD is excellent; chase consistency, not just the fastest average.

    Common mistakes

    • Recording too few shots and drawing firm conclusions.
    • Bad or changing light on an optical unit, causing misreads.
    • Inconsistent placement between strings.
    • Treating an obvious misread (a wildly impossible number) as real data: cull genuine equipment errors, but never delete real shots just because they hurt your SD.
    • Shooting too close to or clipping the unit: check your alignment every time.

    Get the data into your log

    Numbers on the chronograph screen are useless once you pack up unless you record them against the load. LoadNode lets you sync velocities from a Garmin Xero or type them into the charge ladder, then computes live SD and ES per charge and ties them to the recipe: so your chronograph session becomes real load-development data, not a number you forget. It is also the data you need to judge whether two charges are actually different, or just look different on a small sample: see finding a velocity node.

    Handloading is an adult activity. LoadNode is a logbook and analysis tool: it never provides load data. Always develop loads from current published data, start low, and work up safely.

  • How to Choose Reloading Primers

    How to Choose Reloading Primers

    The primer is the smallest component in your cartridge and the easiest to take for granted: but the wrong one can spike pressure, raise your velocity spread, or simply not fit. Knowing how to choose reloading primers means matching the right size and type to your brass and load, and understanding when a magnum primer helps and when it hurts. Here is the practical rundown.

    How to choose reloading primers: brass cartridges and a box of ammunition on the reloading bench

    In this guide

    The four basic primer sizes

    Centerfire primers come in four common types: Small Rifle (SR), Large Rifle (LR), Small Pistol (SP), and Large Pistol (LP). The first rule is simple: the primer must match your case’s primer pocket. Most cartridges have a standard pocket size, but there are exceptions: some match brass has been produced in a small-rifle-primer version of a cartridge that traditionally takes large rifle. The headstamp will not always tell you, so check the brass maker’s current spec for the exact lot in your hand. Always confirm what your specific brass takes before you buy a brick.

    Rifle vs pistol primers (do not swap)

    Rifle and pistol primers are not interchangeable, even when the diameter looks the same. Rifle primers use thicker, harder cups built to handle higher chamber pressures, while pistol primers have softer, thinner cups. Putting pistol primers in a high-pressure rifle load is dangerous: the cup can pierce or fail. Use the primer type your load data specifies, full stop.

    Standard vs magnum primers

    Within rifle and pistol, you will also see standard and magnum versions. A magnum primer produces a hotter, longer-burning flame to reliably ignite large powder charges, ball (spherical) powders, or loads fired in cold weather. The trade-off is that a magnum primer is more energetic, so dropping one into data that was developed with a standard primer can raise pressure and can widen velocity spread. Standard and magnum are not interchangeable slots. Published load data states which primer a given charge was developed and pressure-tested with, and the data only applies with that primer.

    How primers affect accuracy

    Primers are part of your ignition system, and ignition consistency feeds straight into velocity consistency. Swapping primer brands or even lots can measurably shift your SD and ES and move your point of impact. For that reason, precision shooters pick a primer and then stick with one lot through a load workup, treating a primer change as a real variable rather than a casual substitution.

    Choosing and changing primers safely

    • Use the primer your published load data specifies. Where a manual lists a primer for that cartridge, powder and charge, the primer is part of that recipe, not a free slot to fill.
    • Confirm the size against your actual brass: especially with small-rifle-primer match brass.
    • If you change primers, treat it like any component change: go back to the published starting data and work up again from there, watching for pressure signs, because primer brisance affects pressure.
    • Buy enough of one lot to finish a project so your data stays consistent.
    • Handle and store primers carefully: they are sensitive, and they should be seated fully but never forced.

    Do not forget primer seating

    Which primer you pick matters, but so does how you seat it. Primers should be seated fully to the bottom of the pocket, just below flush with the case head, with a consistent feel. A high primer (sitting proud of the head) can cause misfires, inconsistent ignition, or in a worst case a slam-fire, and it will hurt your velocity consistency. Clean primer pockets so every primer seats to the same depth, and develop a feel for that firm, bottomed-out seat. Consistent seating is part of consistent ignition, and ignition consistency is one of several inputs that show up in your SD.

    Track primers in LoadNode

    Because a primer (and its lot) can shift your results, it is worth recording. LoadNode stores the primer in each recipe alongside the bullet, powder, and brass, so when your SD changes you can see exactly which components changed alongside it instead of reconstructing it from memory. The app records and computes; it does not tell you which variable caused what. Pair it with disciplined brass prep for the most consistent ignition.

    Handloading is an adult activity. LoadNode is a logbook and analysis tool: it never provides load data. Always develop loads from current published data, start low, and work up safely.